Rancher Harvester is a product from Rancher that allows organizations to run an HCI solution in their infrastructure. Wait, isn’t Rancher about running Kubernetes? It is. However, using Rancher Harvester, you can actually use it to run virtual machines. How is this possible? Let’s consider Rancher Kubevirt with Harvester to run virtual machines.
What is Rancher Harvester HCI?
Rancher Harvester is a modern HCI solution that allows organizations to modernize their environment by using many of the same tools and stack they are building out their modern infrastructure on.
Harvester runs with SUSE Rancher and Rancher Kubevirt. So, containers and virtual machine workloads can run side-by-side. This helps provide the best of both worlds so admins do not use multiple tools and toolsets to manage their cloud-native infrastructure, unlike traditional virtual machines.
What are the advantages of Harvester Rancher Kubevirt?
When you use Harvester with Rancher, you get the following advantages and capabilities:
- It seamlessly integrates with Rancher to allow seamless management of both virtual machines and containers
- It allows modernizing infrastructure with cloud-native tooling
- It runs on a lightweight HCI solution for Edge environments
- It is 100% open-source
- You can still have enterprise support for production environments with a paid enterprise support subscription from SUSE
There are several installation options when installing Harvester. One of those is installing Harvester directly from Rancher. Using this workflow, you can import and directly manage Harvester clusters through Rancher Virtualization.
This integration allows for many capabilities, including authentication and role-based access control (RBAC) for multi-tenant environments.
What is Harvester built on top of?
Harvester is built on cloud-native technologies and a software stack that includes:
- Longhorn – A lightweight, reliable, and easy-to-use distributed block storage system for Kubernetes
- KubeVirt – A virtual machine management add-on for Kubernetes
- Elemental for openSUSE Leap 15.3 – is a Linux distribution designed to remove as much OS maintenance as possible in a Kubernetes cluster.
Downloading Harvester
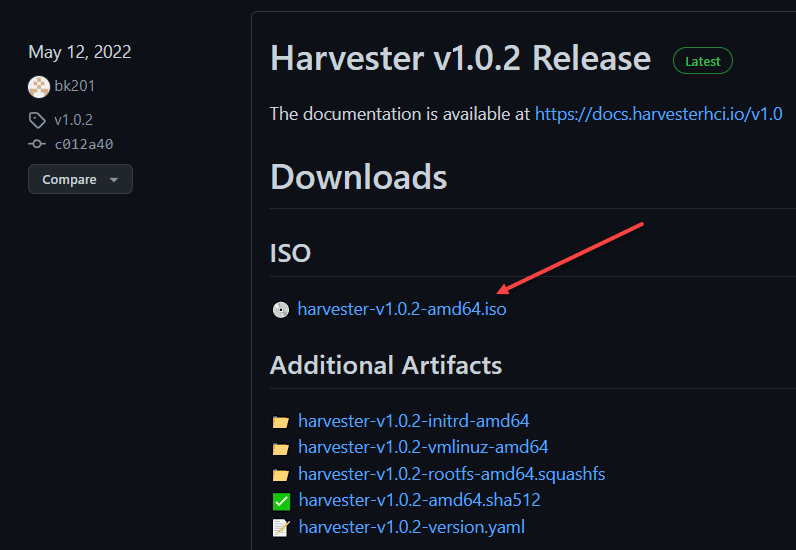
You can download the latest Harvester release from the official Github repo here:
Hopefully, the above link will save you some time. I think Rancher needs to improve how easily you can get to the download, as I clicked around on the site for quite some time to get to the Github page and then had to find it from there. That aside, the download is easy enough. It is rather beefy, weighing in at:
- Roughly 4 GB
- Filename harvester-v1.0.2-amd64.iso
Quick steps for installing Harvester
- Mount the Harvester ISO disk and boot the server by selecting the Harvester Installer. iso-install.png
- Choose the installation mode by creating a new Harvester cluster or joining an existing one.
- Choose the installation device on which the Harvester will be installed to.
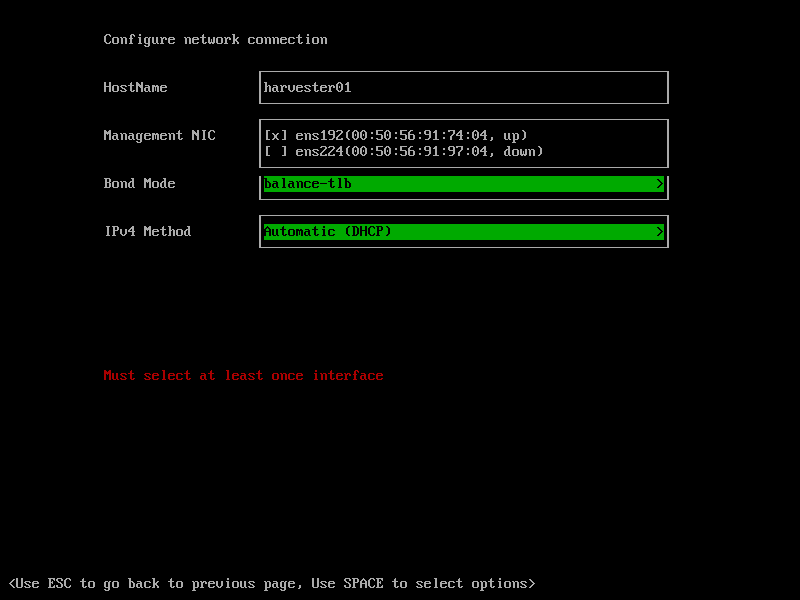
- Configure the hostname and select the network interface for the management network. By default, Harvester will create a bonded NIC named harvester-mgmt, and the IP address can either be configured via DHCP or a static method. iso-installed.png
- (Optional) Configure the DNS servers. Use commas as a delimiter.
- Configure the Virtual IP which you can use to access the cluster or join the other nodes to the cluster.
- Configure the cluster token. This token will be used for adding other nodes to the cluster.
- Configure the login password of the host. The default SSH user is rancher.
- Recommended configuring the NTP server to make sure all nodes’ times are synchronized. This defaults to 0.suse.pool.ntp.org.
- (Optional) Enter the proxy URL address here if you need to use an HTTP proxy to access the outside world. Otherwise, leave this blank.
- (Optional) You can choose to import SSH keys from a remote URL server. Your GitHub public keys can be used with https://github.com/.keys.
- (Optional) Enter the HTTP URL here if you need to customize the host with a cloud-init config.
- After confirming the installation options, Harvester will be installed to your host. The installation may take a few minutes to be complete.
- Once the installation is complete, it will restart the host. After the restart, the Harvester console containing the management URL and status will be displayed. You can Use F12 to switch between the Harvester console and the Shell.
- The default URL of the web interface is https://your-virtual-ip.
Rancher Kubevirt with Harvester FAQs
- What is Harvester? Rancher Harvester is a modern HCI solution that allows organizations to modernize their environment by using many of the same tools and stack they are building out their modern infrastructure on and running containers along with traditional virtual machines using the same platform.
- What is Kubevirt? It is a virtual machine management add-on for Kubernetes that allows Kubernetes to manage and orchestrate virtual machines along with containers
- What is hyper-converged infrastructure? Hyper-converged infrastructure (HCI) is a modern way to consolidate hardware and software into a unified platform where compute, storage, and networking are delivered as a homogeneous solution with an integrated software stack
Wrapping Up
Rancher Kubevirt with Harvester to run Virtual Machines with Kubernetes is an extremely interesting way to have a unified solution to run Kubernetes containers and virtual machines in the same software stack. Harvester provides seamless integration with Rancher and uses other cloud-native technologies delivered by Rancher to provide a single solution to manage all types of workloads.


0 Comments