In this blog post, we’ll guide you through installing Pi-hole on Proxmox, a powerful and efficient DNS server that blocks ads and enhances your network performance. By the end of this post, you’ll have Pihole on Proxmox up and running on a Proxmox LXC container, ready to improve your browsing experience and network security.
Part 1: Understanding Proxmox, Pi-hole, and their Benefits
Before diving into the installation process, it’s essential to have a basic understanding of Proxmox and Pi-hole and the advantages they offer.
Proxmox is an open-source virtualization platform that allows you to create and manage virtual machines and containers. It provides an easy-to-use web interface for managing your virtual environment, making it an ideal choice for home labs and enterprise environments. The Proxmox host is a great way to run Pi-Hole in your environment.
Benefits of Proxmox:
Cost-effective: Proxmox doesn’t require costly licensing fees as an open-source solution.
Scalable: Proxmox can easily scale to accommodate growing workloads and infrastructures.
High-performance: Proxmox supports KVM and LXC virtualization, ensuring optimal resource usage and performance.
Pi-hole: Pi-hole is an open-source network-wide ad blocker and DNS server. It intercepts DNS queries, blocks ads, trackers, and improves network performance.
Benefits of Pi-hole:
Network-wide ad blocking: Pi-hole provides ad-blocking functionality for all devices on your network without needing individual ad-blocking software. Blocking ads improves security and the browsing experience
Enhanced privacy: By blocking trackers, Pi-hole helps protect your privacy online.
Improved network performance: With reduced ad traffic, your network experiences less congestion and faster browsing speeds.
Part 2: Setting Up Your Proxmox Environment
Before installing Pi-hole, you must have a Proxmox environment set up. If you’re new to Proxmox, follow these initial steps:
Download the Proxmox ISO from the official website.
Create a bootable USB drive or burn the ISO to a DVD.
Install Proxmox on your preferred hardware (bare-metal or virtual machine).
Complete the initial Proxmox setup by configuring the network and storage.
Part 3: Creating a Proxmox LXC Container for Pi-hole
To install Pi-hole on Proxmox, we’ll first create a new Linux container (LXC) container setup within the Proxmox server. Follow these steps:
Log in to your Proxmox web interface.
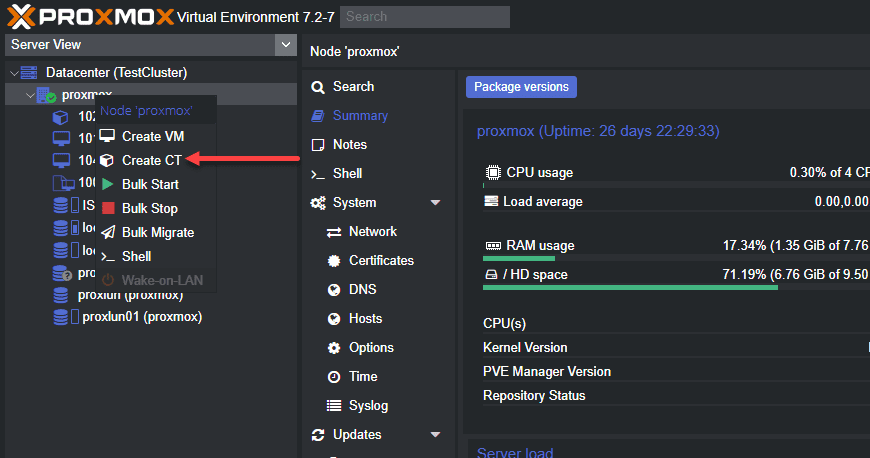
Click on your Proxmox node in the left sidebar.
Select “Create CT” to create a new container.
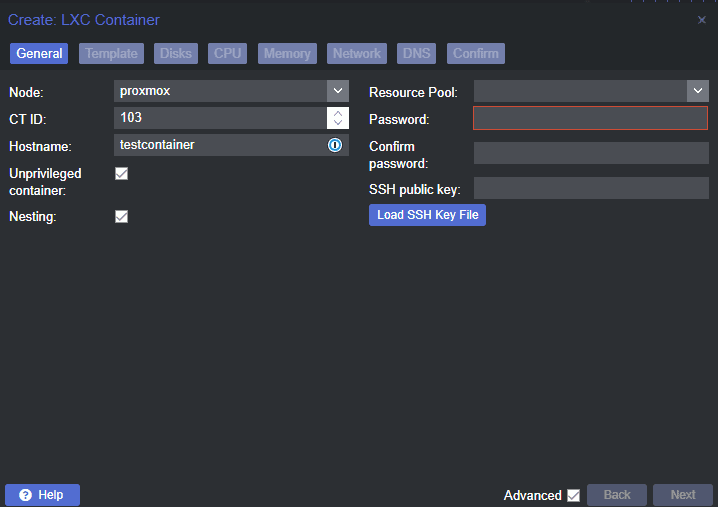
Fill in the necessary information, such as hostname and password.
Downloading and Choosing a Container Template (CT templates)
First, let’s download the Container Template. Navigate to your local storage, CT templates, and click Templates.
You can search for a specific distro for your container. Below, we are entering Ubuntu.
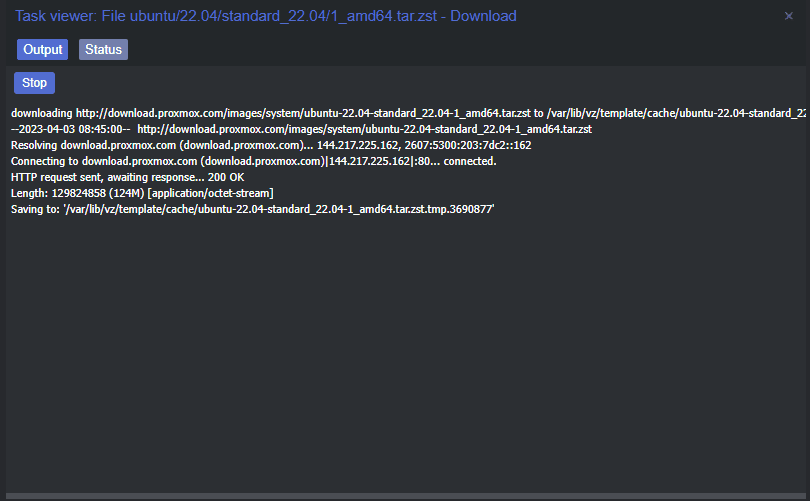
The download of the container image begins.
Creating a new container and Configuring Container Resources
It is easy to create a new container in Proxmox.
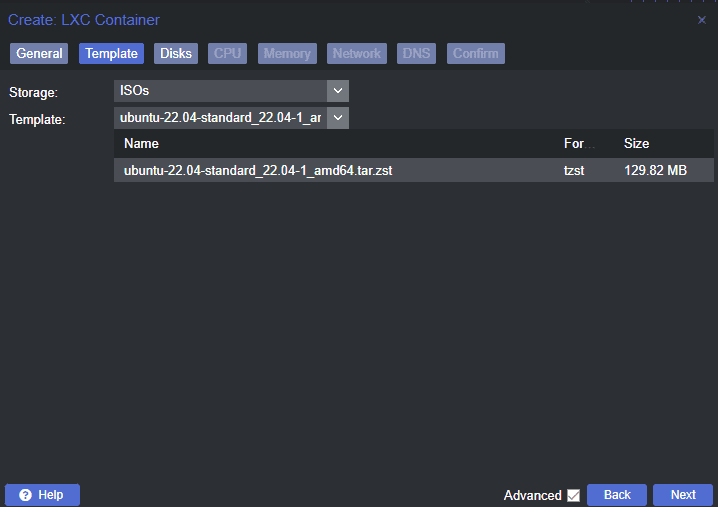
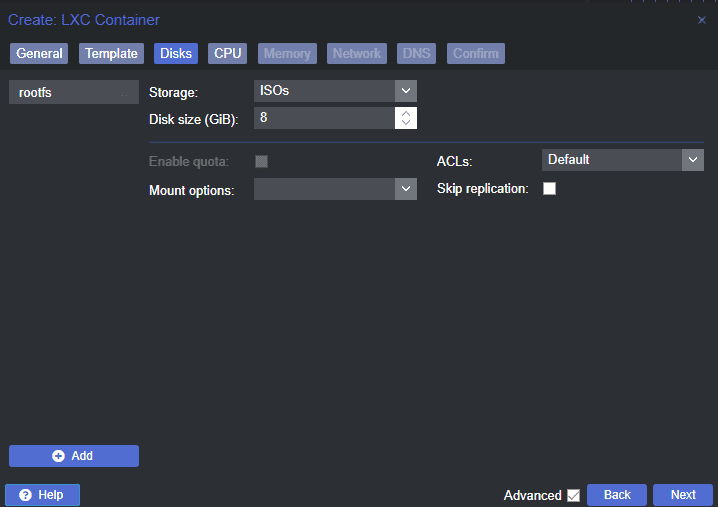
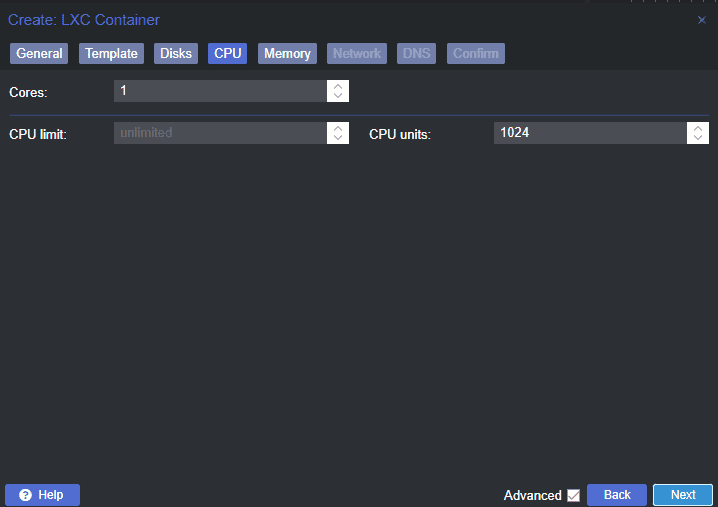
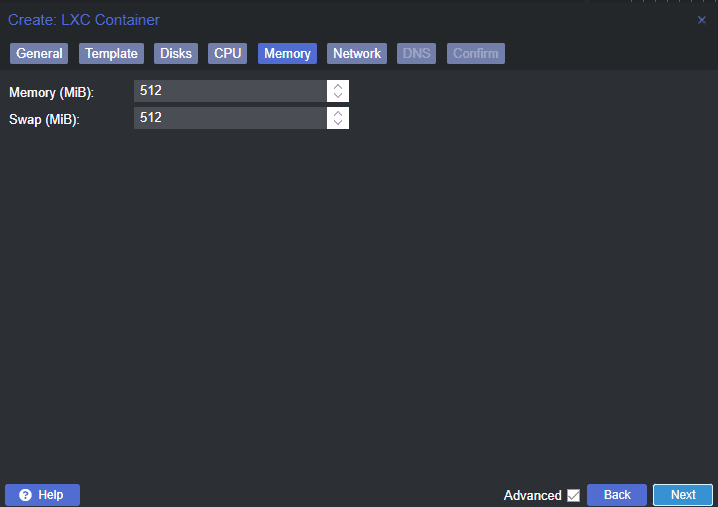
Next, allocate resources to your container by configuring the Name, Template, CPU, and Memory:
First, name the container and enter a password.
Choose the Proxmox template you want to use for the new Pi-Hole container.
Under the “Disk Size” section, define the storage space you want to allocate to the container. A minimum of 8 GB is recommended to accommodate future updates and additional blocklists.
Click on the “CPU” tab and set the desired number of cores. For most home users, 1-2 cores should be sufficient.
Navigate to the “Memory” tab and allocate the appropriate amount of RAM. A minimum of 1 GB is recommended for smooth operation.
Setting Up the Network
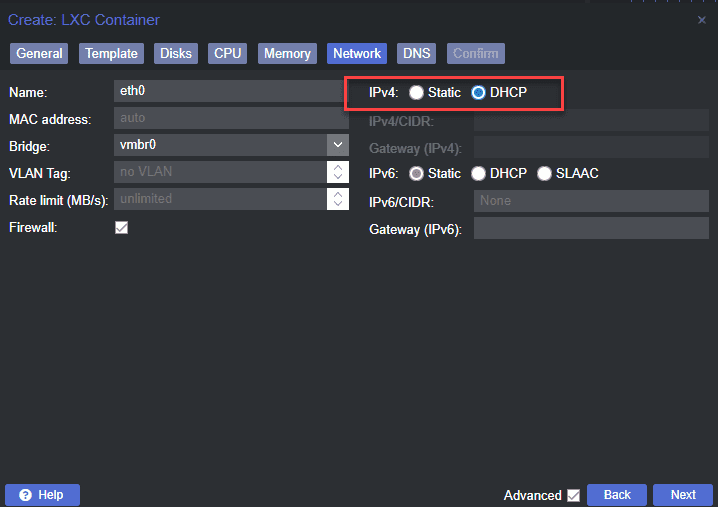
To ensure proper communication between the Pi-hole container and your network, you’ll need to configure the network settings:
Navigate to the “Network” tab within the container creation dialog. Choose a static IP address within your network’s IP range, making sure it doesn’t conflict with other devices. You can also use DHCP, if you can create a reservation for the specific IP pulled from DHCP.
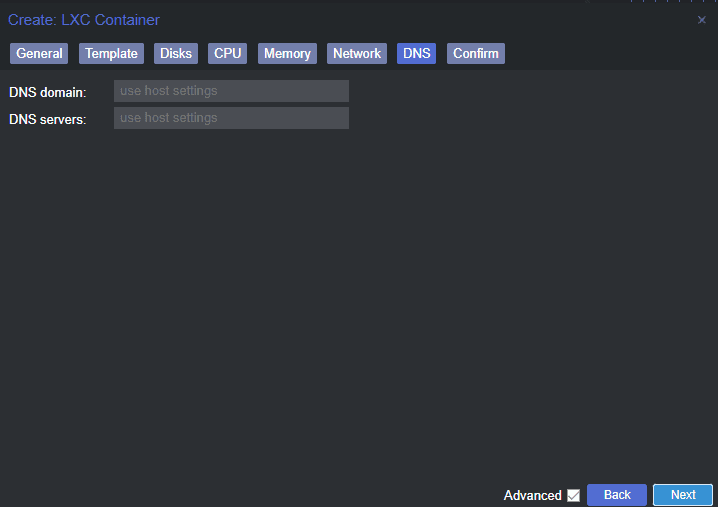
You can also set the DNS servers configuration for the Pi-Hole container. On the DNS tab, enter the DNS domain and DNS servers.
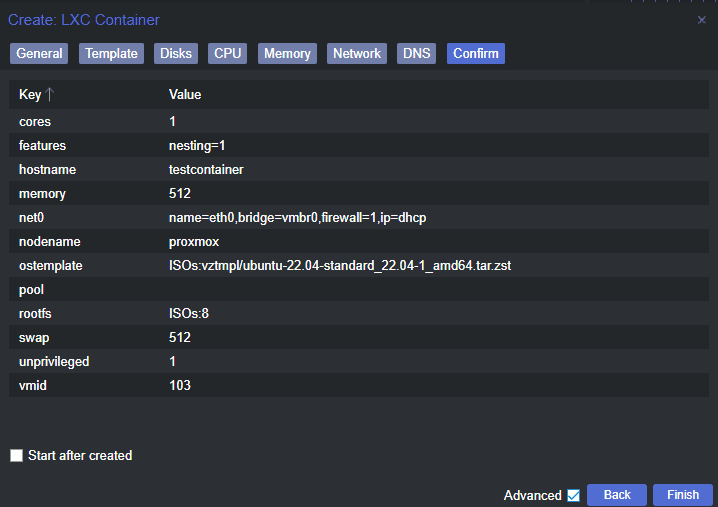
Once you’ve completed the container configuration, click “Finish” to create the container. Proxmox will now set up your new LXC container with the specified resources and network settings.
Part 4: Installing Pi-hole on the Proxmox LXC Container
Now that we’ve created the LXC container, it’s time to run the Pi-Hole installer. Follow these steps:
Access your newly created container using SSH or the Proxmox web console.
Log in with the ‘root’ user and the password you set during container creation.
Update the container’s package lists and install any available updates with the following commands:
apt update apt upgradeInstall the ‘curl’ utility, which will be used to download the Pi-hole installation script:
apt install curlDownload and execute the Pi-hole installation script using the following command:
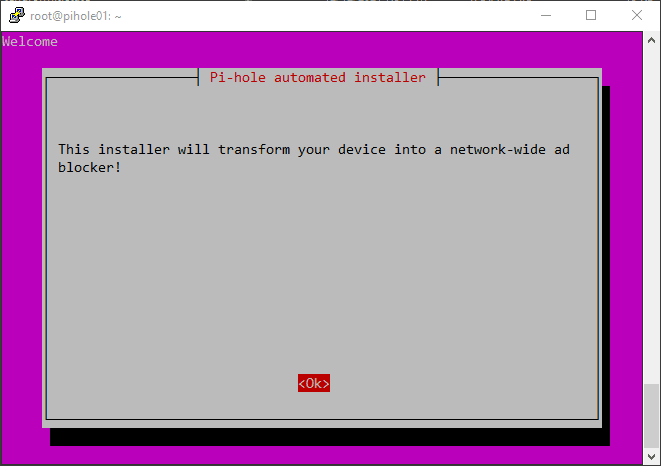
curl -sSL https://install.pi-hole.net | bashFollow the on-screen prompts to configure Pi-hole to your preferences for running Pi-Hole.
Configuring Pi-hole DNS Settings
During the Pi-hole installation process, you’ll need to configure the DNS settings:
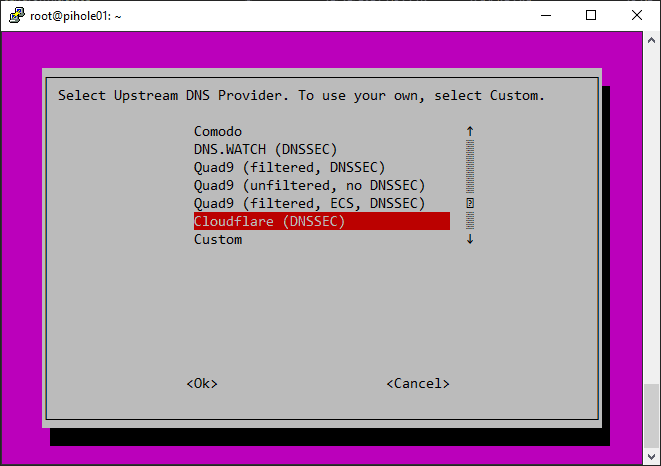
When prompted to choose an upstream DNS provider, select from the following DNS server addresses (e.g., Google DNS, OpenDNS, etc.).
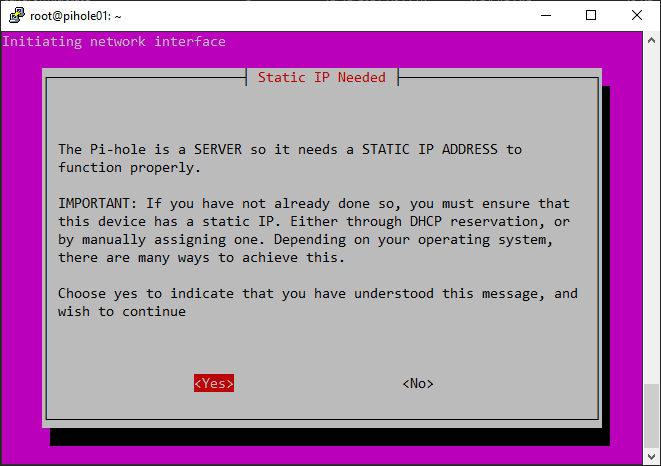
Pi-hole will automatically detect your container’s static IP address. Confirm that the detected IP address is correct.
Set a custom IPv4 or IPv6 address, following the on-screen instructions.
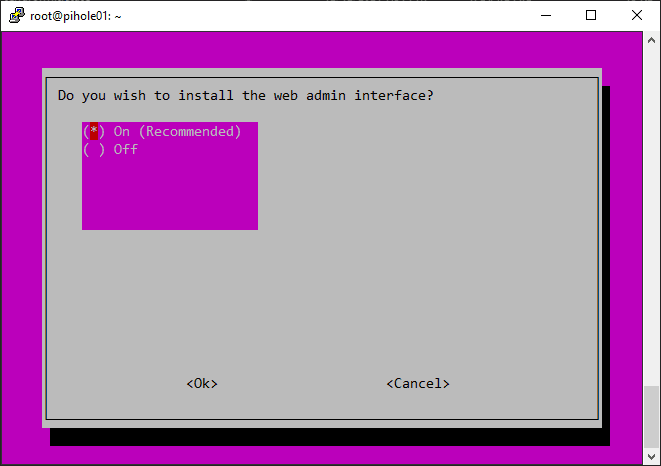
Once you’ve configured the DNS settings, the Pi-hole installation will continue, and you’ll be prompted to set an admin password for the web interface. Note the following additional screens.
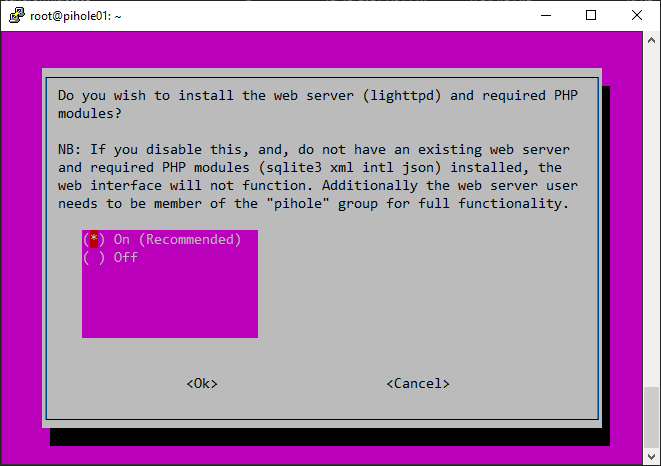
Prompt to install the lighttpd web server.
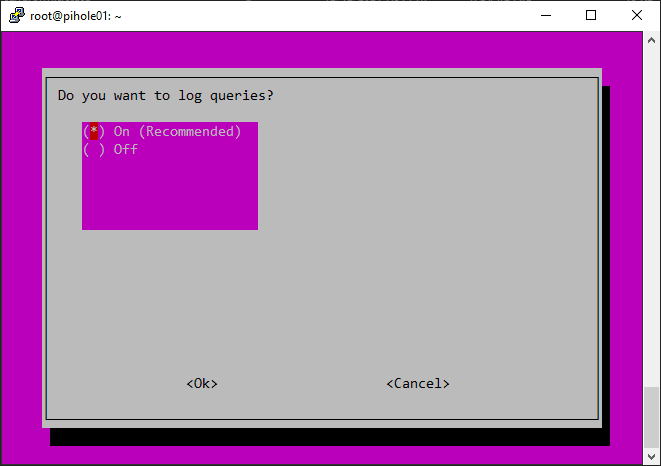
Log queries by default.
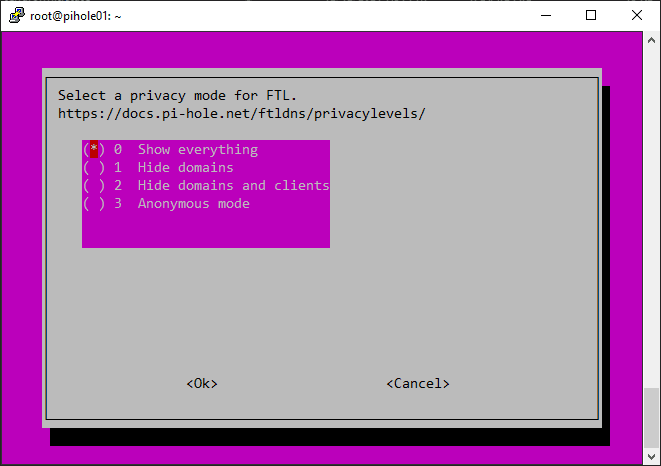
Select your privacy mode.
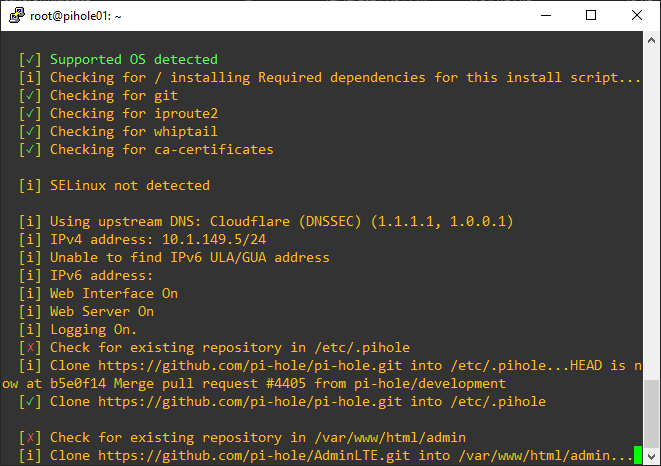
Finishing out the script.
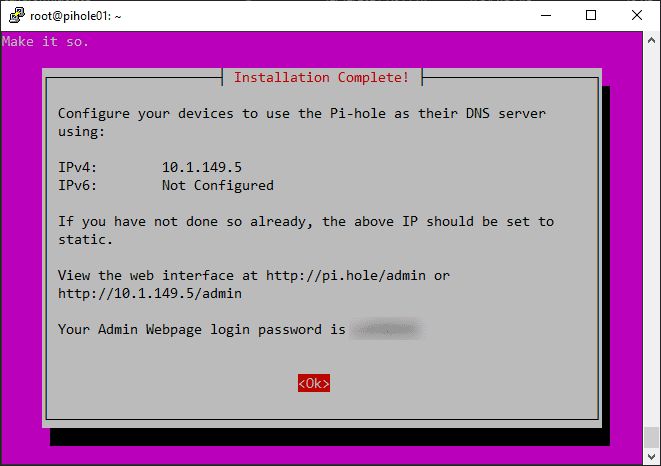
You will see your admin URL listed along with the generated admin login password.
Part 5: Configuring Your Network to Use Pi-hole as the Primary DNS Server
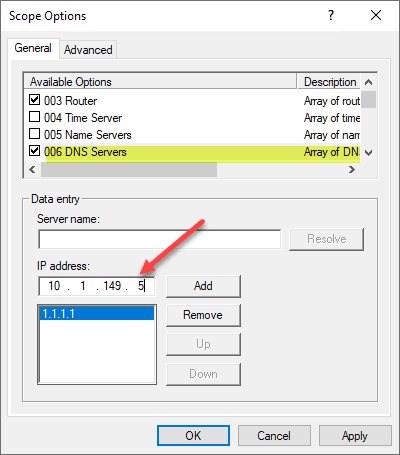
To ensure that all devices on your network use the Pi-hole DNS server, you must update your router or DHCP server settings. DHCP servers allow you to specify the DNS servers you want to hand out with the IP address configuration.
Access your router or DHCP server’s web interface.
Locate the DNS settings, usually found under the LAN or DHCP settings.
Replace the existing DNS server addresses with the static IP address of your Pi-hole container.
Save the changes and reboot your router or DHCP server if necessary.
Part 6: Accessing and Managing Your Pi-hole Server
To manage your Pi-hole server and view its statistics, navigate to the Pi-hole web interface using the URL provided after the installation:
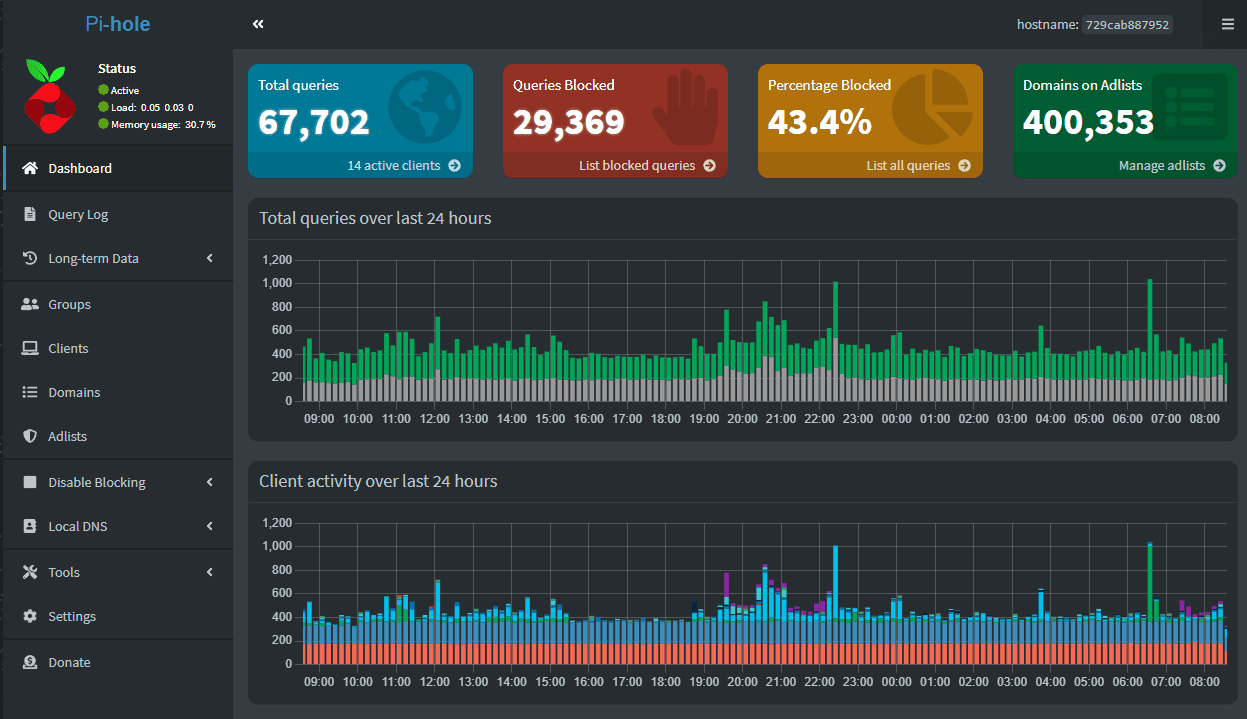
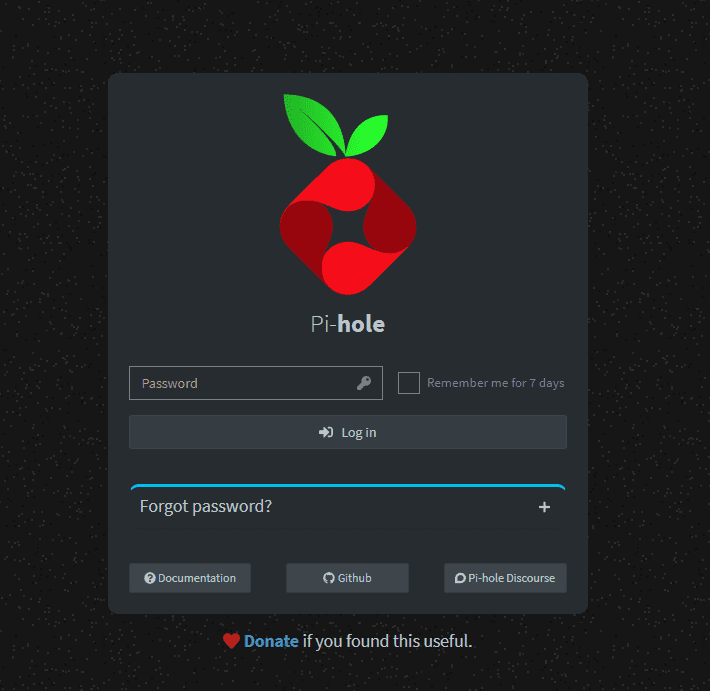
Open a web browser and enter the Pi-hole website address followed by /admin (e.g., http://192.168.1.100/admin). This is the admin web interface.
Log in using the admin password you set during the configuration process.
Part 7: Enhancing Security and Privacy with Pi-hole
In addition to its ad-blocking capabilities, Pi-hole can also be used to improve security and privacy on your network. Follow these steps to enable additional security features:
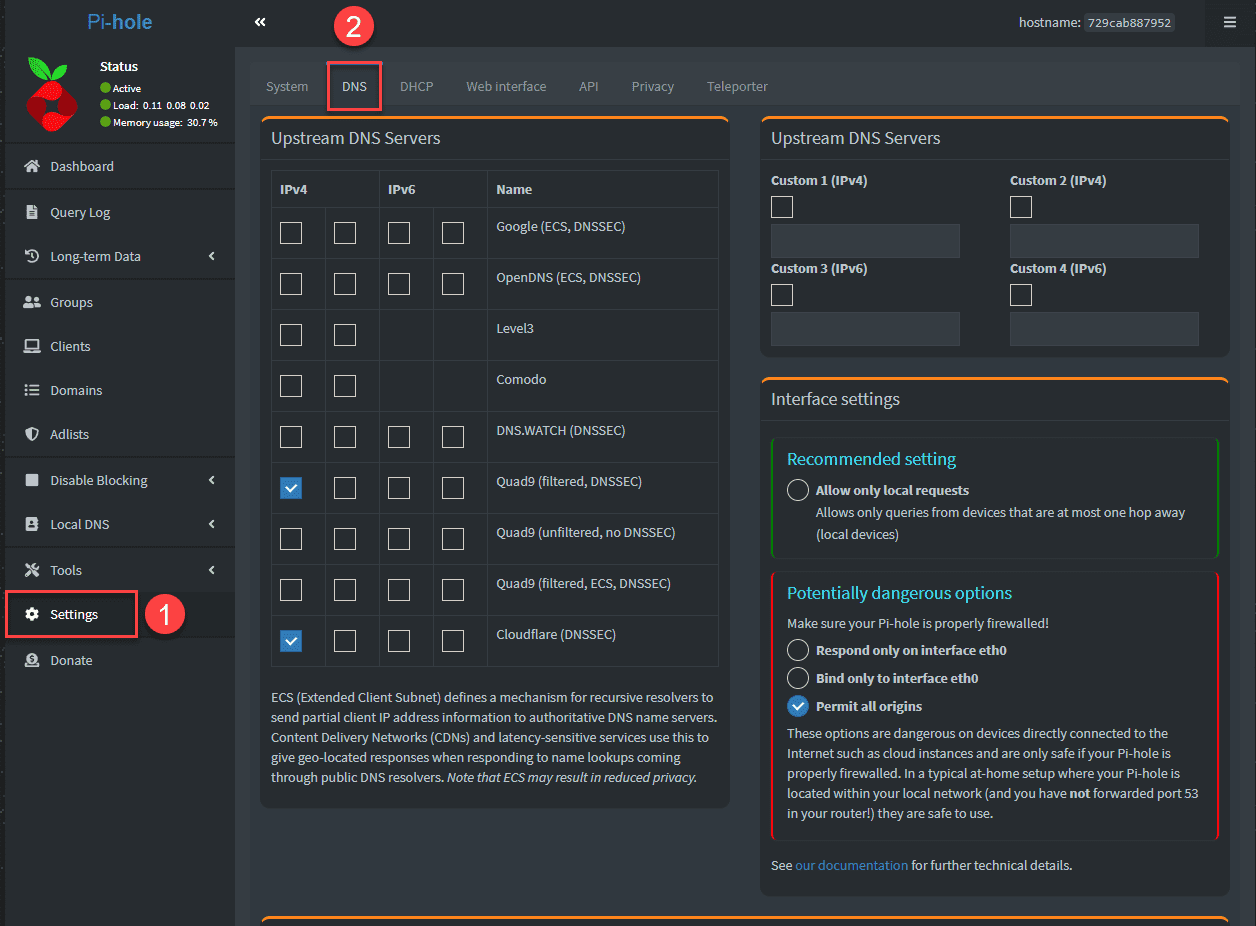
Access the Pi-hole web interface. Navigate to the “Settings” tab.
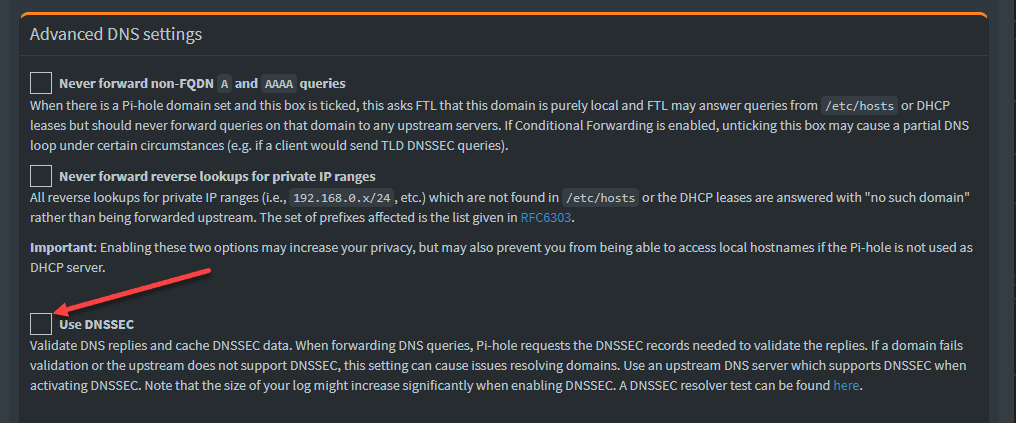
On the DNS Tab, enable DNSSEC to ensure the integrity and authenticity of DNS data.
Consider enabling additional blocklists to protect against malware, phishing, and other malicious activities.
Part 8: Integrating Pi-hole with Third-Party Services
You can further enhance your Pi-hole experience by integrating it with third-party services and tools:
DoH/DoT support: Secure your DNS traffic by using DNS over HTTPS (DoH) or DNS over TLS (DoT) with compatible clients or by setting up a proxy server.
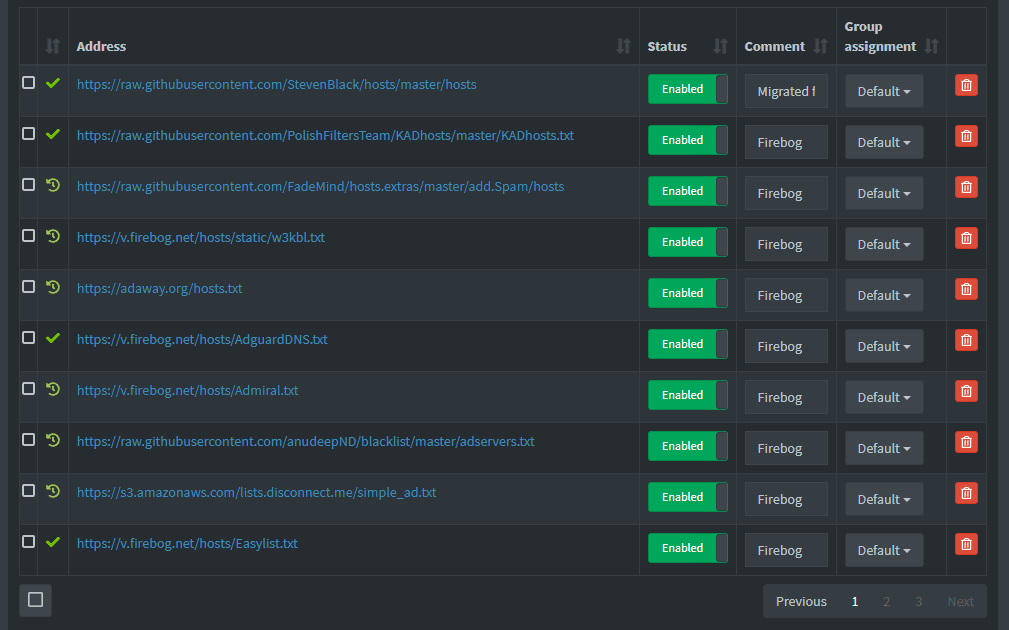
Custom blocklists: Expand your ad-blocking capabilities by adding custom blocklists from sources like Steven Black’s Hosts, Energized Protection, or the AdGuard DNS filter.
Integration with home automation systems: Connect your Pi-hole server to home automation platforms like Home Assistant to monitor and control your ad-blocking and DNS settings from a centralized interface.
VPN support: Combine Pi-hole with a VPN server, such as OpenVPN or WireGuard, to protect your network traffic and block ads even when you’re away from your home network.
Logging and monitoring: Integrate Pi-hole with log management and monitoring tools like Grafana or Splunk to visualize your DNS statistics and get insights into your network’s performance and security.
Part 9: Configuring Pi-hole for IoT Devices
Internet of Things (IoT) devices are becoming increasingly prevalent in our homes and offices. These devices often rely on DNS services to function properly, and using Pi-hole can help secure and protect your IoT devices from unwanted ads, trackers, and potential security threats. To configure Pi-hole for your IoT devices, follow these steps:
Configure your DHCP server to assign the Pi-Hole IP as the primary DNS server.
You can also assign a secondary DNS server, including a second instance of Pi-Hole if you configure one
Add any necessary custom whitelists to Pi-hole to allow specific IoT devices to access required services without interruption.
Regularly monitor the Pi-hole web interface to identify any unusual DNS requests coming from your IoT devices, which could indicate a security concern or malware infection.
By configuring Pi-hole to work with your IoT devices, you can enhance their security, privacy, and overall performance while protecting your entire network.
Part 10: Troubleshooting Common Pi-hole Issues
While using Pi-hole on Proxmox, you might encounter some common issues. Here are some troubleshooting tips to help you resolve these issues:
DNS resolution issues: If you experience problems with DNS resolution, double-check your network settings and ensure that your devices are configured to use the Pi-hole server as their primary DNS server. You can also verify that the upstream DNS servers functioning correctly.
Web interface access issues: If you’re unable to access the Pi-hole web interface, ensure that your firewall settings aren’t blocking the necessary ports (usually 80 and 443) and that your Pi-hole server’s IP address is correct.
High CPU or memory usage: If your Proxmox LXC container is consuming excessive resources, consider increasing the allocated CPU, memory, or disk space, or reducing the number of blocklists enabled in Pi-hole.
Unwanted ads still appearing: If you notice that some ads are still being displayed, you can manually add the offending domains to your Pi-hole blocklist or explore additional community-curated blocklists to enhance your ad-blocking capabilities.
Part 11: Creating Backup and Restore Strategies for Your Pi-hole Setup
Maintaining a reliable and secure Pi-hole setup on Proxmox involves creating backup and restore strategies to protect your data and configuration settings. Here are some tips for backing up and restoring your Pi-hole configuration:
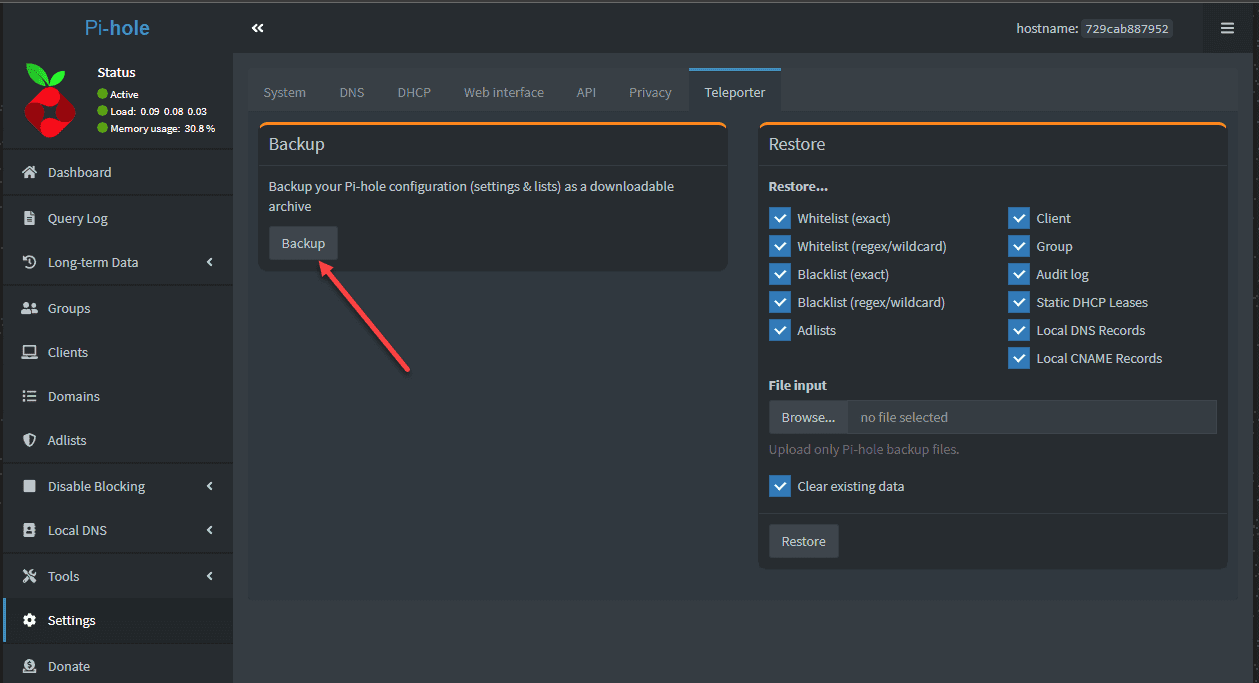
Backup your Pi-hole configuration: Use the built-in Teleporter feature in the Pi-hole web interface to export your configuration settings, blocklists, and custom whitelists. Store these backups in a safe location, such as an external hard drive or cloud storage service.
Schedule regular backups: To ensure that you always have an up-to-date backup of your Pi-hole configuration, consider automating the backup process using tools like ‘cron’ on Linux or Task Scheduler on Windows.
Backup your Proxmox LXC container: Proxmox offers built-in tools for creating snapshots and backups of your LXC containers. Use these features to create a full backup of your Pi-hole container, including its operating system, installed packages, and configuration files.
Restore your Pi-hole configuration: In the event of a system failure or corruption, you can easily restore your Pi-hole setup by re-creating the LXC container on Proxmox and importing your saved configuration using the Teleporter feature in the Pi-hole web interface.
Implementing these backup and restore strategies ensures your Pi-hole installation’s ongoing stability and security on Proxmox.
Wrapping up
With this guide, you can successfully install Pi-hole on a Proxmox LXC container, providing network-wide ad blocking and improved performance for your entire network.
With Pi-hole’s powerful features and the flexibility of Proxmox, you now have a cost-effective, scalable, and high-performance DNS solution for your home or business.
To get the most out of your Pi-hole installation on Proxmox, keep the following best practices in mind:
Regularly update your Pi-hole server to ensure you have the latest security patches and features.
Monitor the Pi-hole web interface to fine-tune your blocklists and DNS settings based on your network’s needs.
Keep an eye on the resource usage of your Proxmox LXC container and adjust the allocated resources as needed to maintain optimal performance.
With these best practices, you can maintain a reliable, secure, and efficient network using Pi-hole on Proxmox.




0 Comments