As the world of operating systems continues to evolve, many users find themselves with older systems that struggle to keep up with the latest software and OS releases. Microsoft’s Windows 11, for example, has left many users with older PCs unable to upgrade due to strict system requirements.
However, there is a solution for those who still want to experience the benefits of Windows 11 without sacrificing performance on their older systems: Tiny11 OS. This blog post will explore Tiny11 OS, a lightweight Windows 11 version explicitly designed for older systems, and how to install it on your PC.
Debloat Windows 11 From Unnecessary Microsoft Store App installs and Services
One of the main reasons Tiny11 OS is a great option for older systems is its stripped-down version of Windows 11, which removes many unnecessary apps and services. This significantly reduces the normal Windows operating system’s size and resource usage, making it an ideal choice for systems with dual-core processor configurations, limited RAM and disk space or a lightweight virtual machine that might be unsupported hardware otherwise.
Before we dive into the installation process, let’s discuss some methods to debloat Windows 11.
Use traditional uninstall methods
The first method to debloat Windows 11 is by using the traditional uninstall method. You can uninstall unwanted apps from the Start menu by right-clicking on them and selecting “Uninstall.” Additionally, you can use the “Apps & features” section in the Settings app to remove unnecessary apps and services.
Downloading Tiny11 ISO File and Creating a Bootable USB Drive
To install Tiny11 OS, download the Tiny11 ISO image from the Internet Archive or the Tiny11 OS GitHub project page. Once you have downloaded the ISO file, you can create a bootable USB drive using software like Rufus or Balena Etcher. To do this, simply insert a USB flash drive with at least 8GB of storage capacity into your computer, open the software, select the Tiny11 ISO file, and follow the on-screen instructions to create a bootable USB drive.
Disable Cortana on Windows 11 using Debloater
Another method to debloat Windows 11 is by disabling Cortana, Microsoft’s virtual assistant. Although Cortana can be helpful, it can also consume system resources, making it less than ideal for older systems. You can disable Cortana by using a debloater tool, such as the one available on GitHub. Simply download and run the debloater, and it will automatically disable Cortana for you.
Remove Bloatware with Custom Blocklist on Windows 11
After installing Tiny11 OS, you may still want to remove any remaining bloatware from your system. To do this, you can create a custom blocklist and use PowerShell to remove unwanted apps. Simply create a text file with a list of app package names you want to remove, save it as a .txt file, and then run the following PowerShell command:
Get-Content "Pathtoyourblocklist.txt" | ForEach-Object { Get-AppxPackage -Name $_ | Remove-AppxPackage }Uninstall OneDrive
OneDrive, Microsoft’s cloud storage service, is another app that may consume system resources on older systems. To uninstall OneDrive, open File Explorer, navigate to the OneDrive folder, and double-click the “Uninstall OneDrive” script. Follow the on-screen instructions to complete the uninstallation process.
Use the debloat command in Powershell
You can also use the debloat command in PowerShell to remove additional bloatware from your Tiny11 OS installation. To do this, open PowerShell with administrator privileges and enter the following command:
Get-AppxPackage -AllUsers | Remove-AppxPackageCreate a Bootable Drive
As mentioned earlier, to install Tiny11 OS, you will need to create a bootable USB drive. This can be done using software like Rufus or Balena Etcher. Ensure that your USB flash drive has enough storage capacity (at least 8GB) and is properly formatted before creating the bootable drive.
Use the Windows 11 debloater from GitHub
Another way to debloat Windows 11 is by using a debloater tool available on GitHub. Simply download the debloater script, open PowerShell with administrator privileges, and run the script. The debloater will remove unwanted apps and services from your system, making it more lightweight and suitable for older systems.
Components Removed in Tiny11 OS
Tiny11 OS is a lightweight version of Windows 11 designed to run on older systems with limited resources. This is achieved by removing various components and rudimentary apps, including:
Microsoft Store
Microsoft Edge allowing you to have Google Chrome only
Microsoft Teams
Cortana
OneDrive
Xbox Identity Provider
Microsoft Defender Antivirus
Unnecessary background services (sound recorder, etc)
By removing these components, Tiny11 OS reduces system resource consumption, making it more suitable for older PCs with limited RAM and disk space.
Tiny11 OS GitHub Project Download
To download Tiny11 OS, visit the Tiny11 OS GitHub project page. The project page contains the latest version of the Tiny11 ISO file and instructions on how to create a bootable USB drive and install the operating system.
ntdevlabs/tiny11builder: Scripts to build a trimmed-down Windows 11 image. (github.com)
Build the Tiny11 ISO file
I recently created a blog post covering Windows 11 Debloater with the Tiny11 OS option here, which describes in detail how to create the Tiny11 OS from their GitHub tool.After building the Tiny11 ISO file, you can use software like Rufus or Balena Etcher to create a bootable USB drive. Insert a USB drive with at least 8GB of storage capacity, open the software, and follow the on-screen instructions to create a bootable USB drive with the Tiny11 ISO file.
Change the Boot Order of your Computer
Before installing Tiny11 OS, you need to change the boot order of your computer to prioritize booting from the USB drive. To do this, restart your computer and enter the BIOS by pressing the appropriate key (usually F2, F10, or DEL). Once in the BIOS, navigate to the boot settings and change the boot order to prioritize the USB drive. Save the changes and exit the BIOS.
Overview of how to Install Tiny11 OS
Now that you have prepared your bootable USB drive, it’s time to install Tiny11 OS. Follow these steps to complete the installation process:
- Insert the bootable USB drive into your computer and restart it.
- Your computer should now boot from the USB drive. If prompted, press any key to boot from the USB drive.
- When prompted, select “Custom” to perform a clean installation. This will erase your existing Windows installation and replace it with Tiny11 OS.
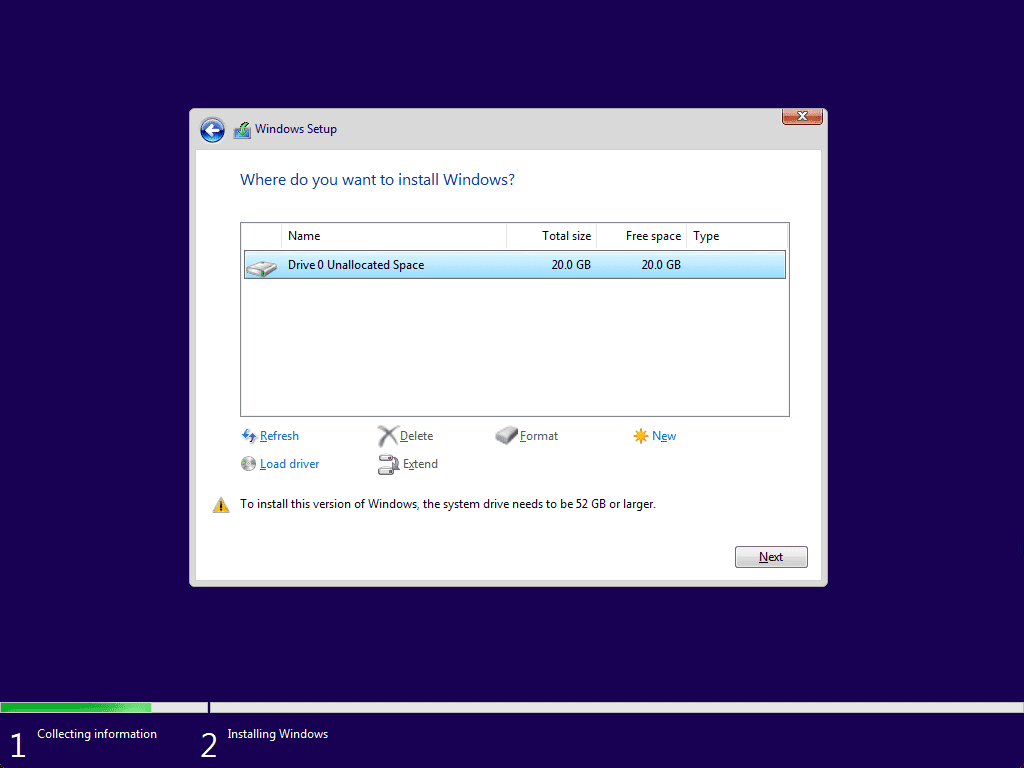
- Select the drive where you want to install Tiny11 OS and click “Next.”
- The installation process will begin and may take a few minutes to complete. Once the installation is finished, your computer will restart, and you will be prompted to set up your new Tiny11 OS.
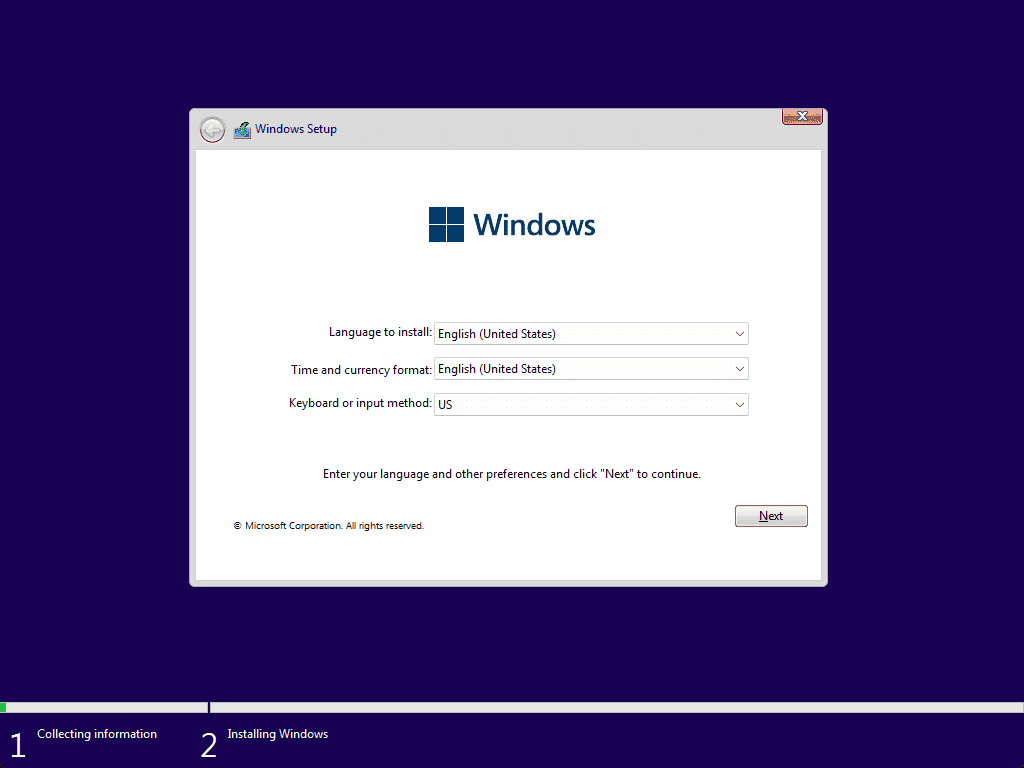
- The Windows 11 OS installation screen will appear. Follow the on-screen instructions to proceed with the installation. You will be asked to select your language, time format, and keyboard method.
Install Tiny11 OS from ISO
Once you have created a bootable USB drive with the Tiny11 ISO file, you can install Tiny11 OS on your older system by following the steps outlined earlier in this blog post. Make sure to change the boot order of your computer so it boots from the USB drive, and follow the on-screen instructions to complete the installation process.
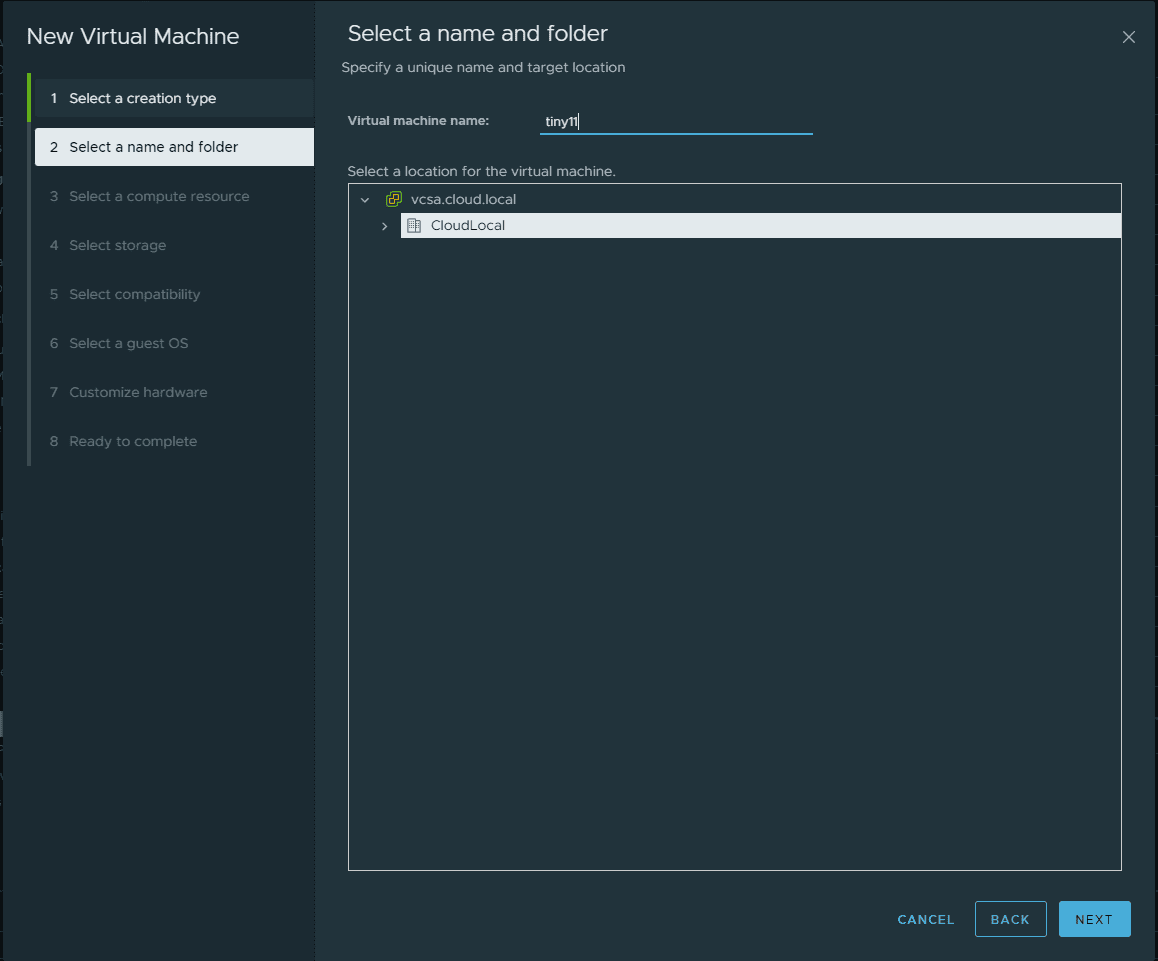
Below, we are using a new VMware vSphere virtual machine.
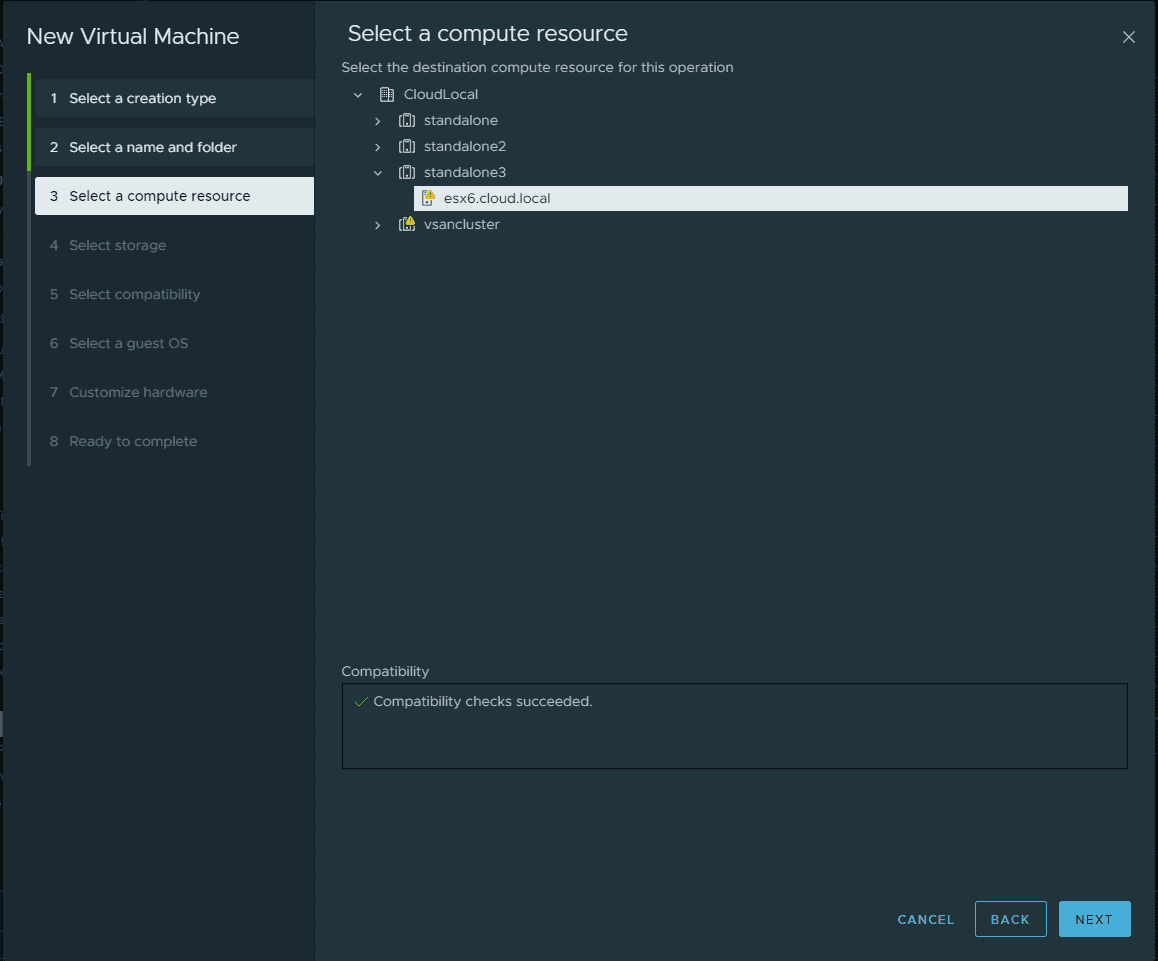
Selecting the compute resource.
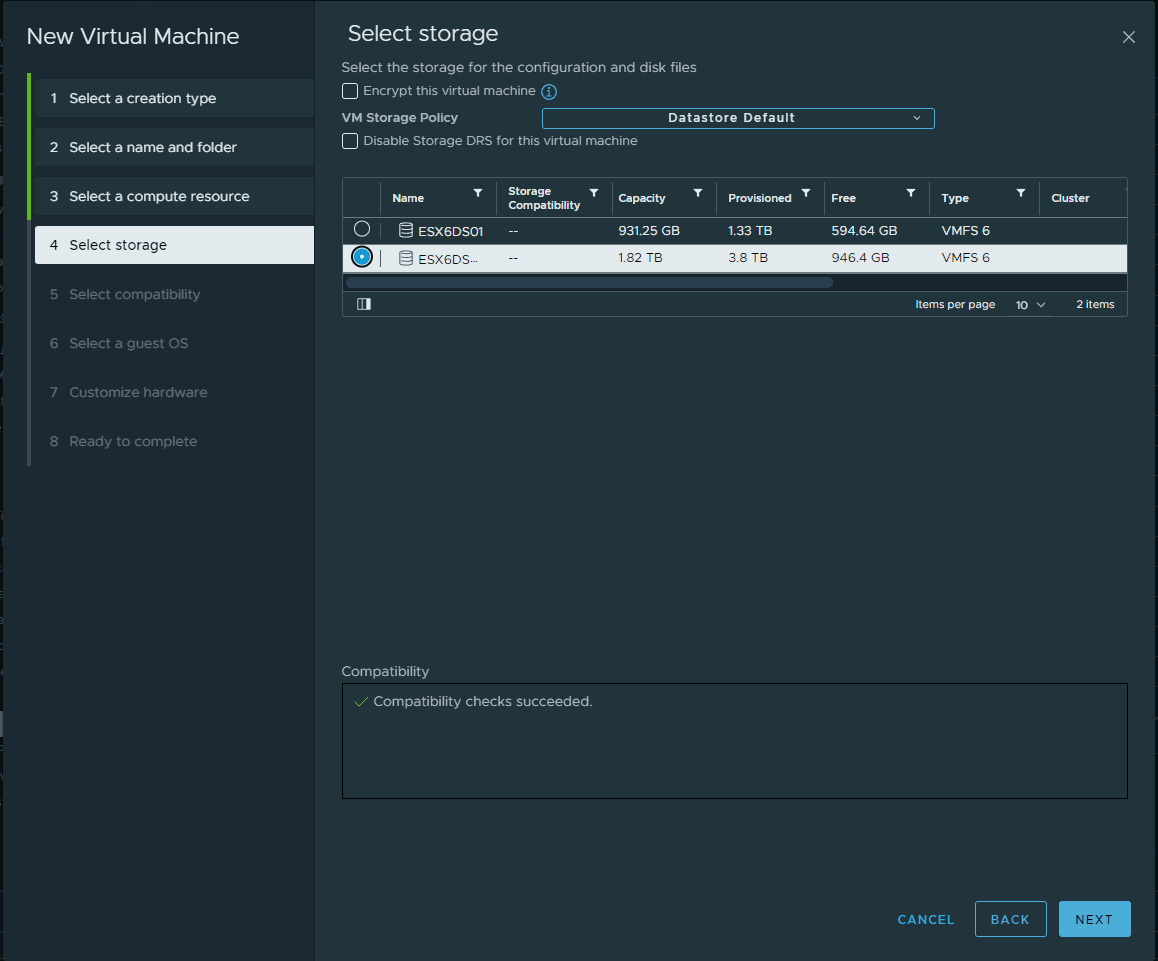
Select storage.
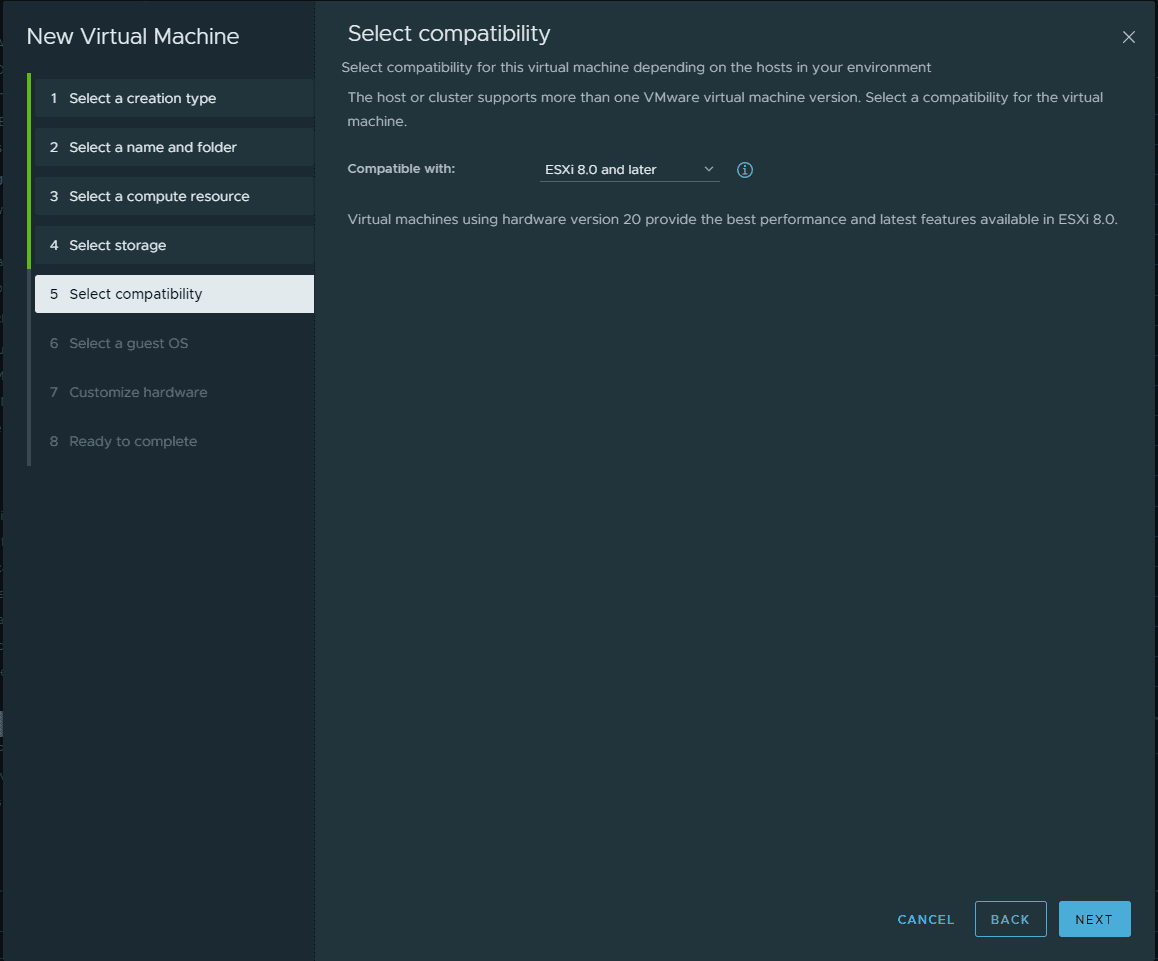
Select compatibility from vSphere perspective.
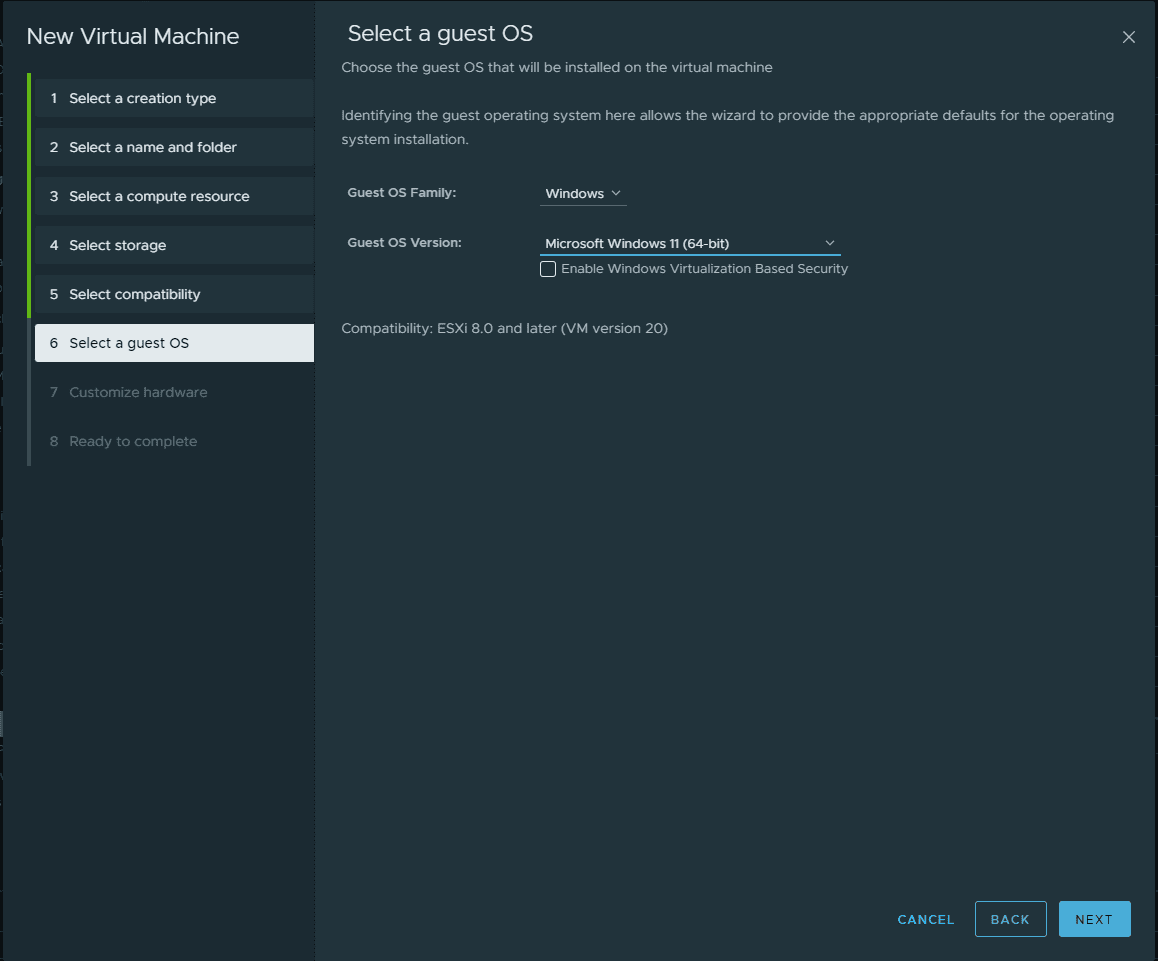
Select Windows 11 x64 as the guest operating system.
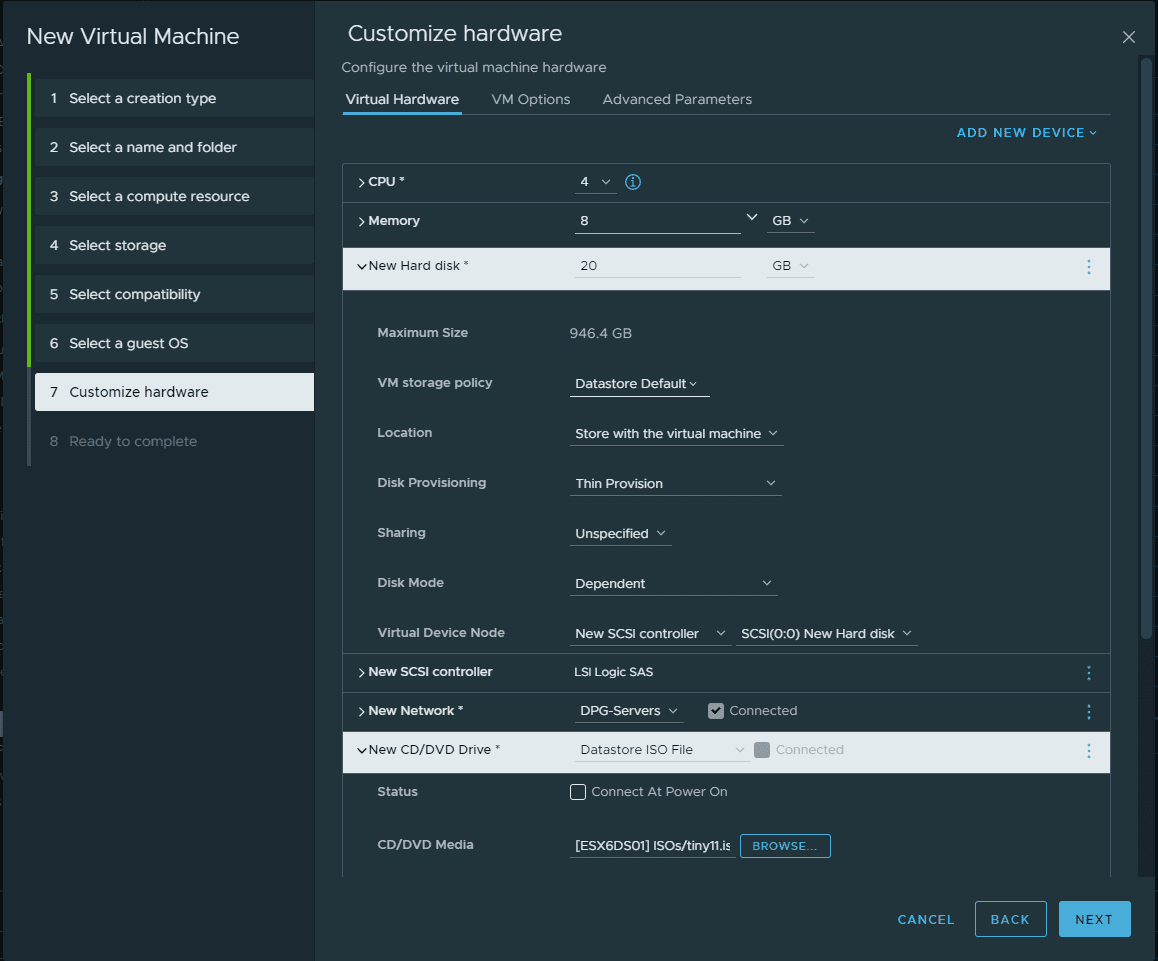
On the customize hardware screen, note I have configured 4 gigs of memory, and ISO image from the Tiny 11 OS ISO build.
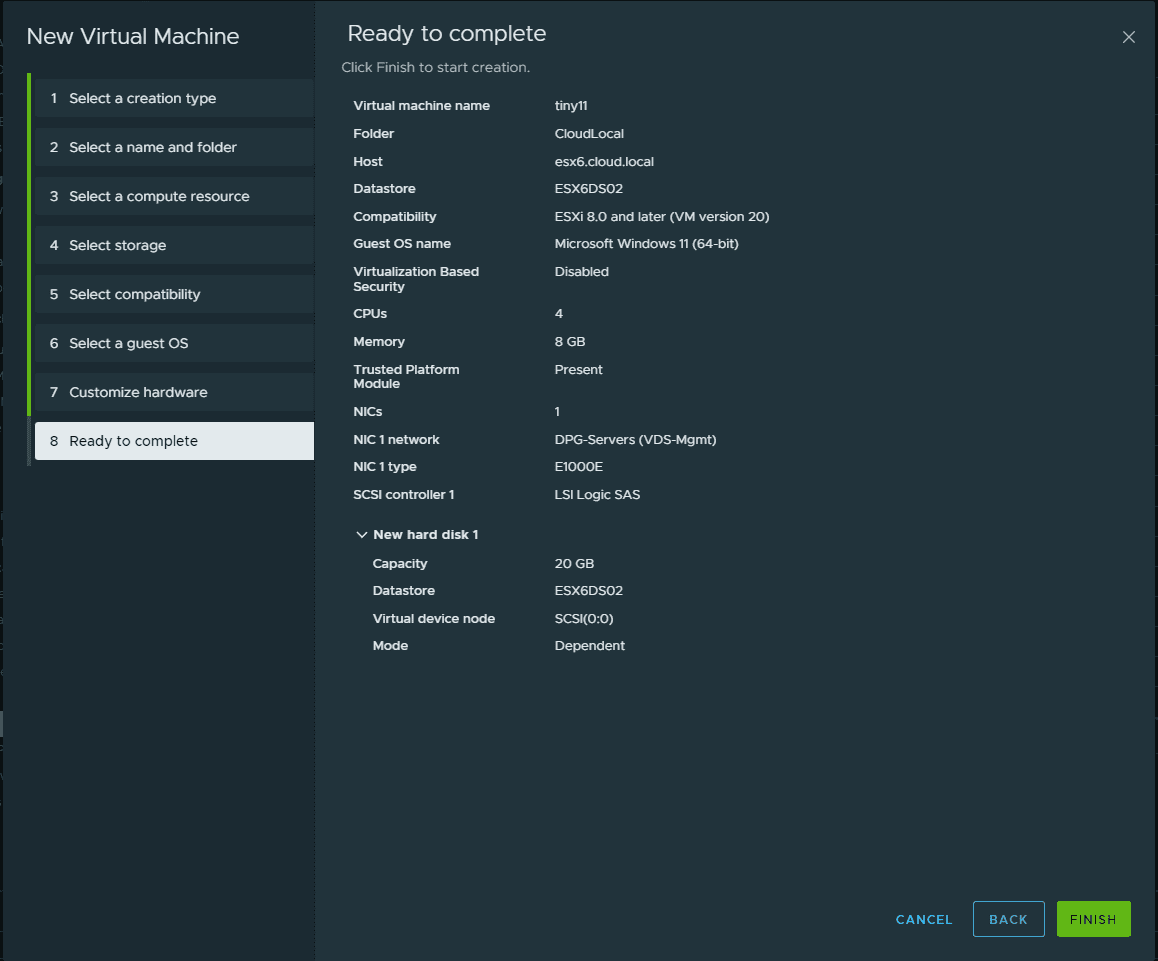
Finalize the hardware configuration.
Booting Tiny11 OS for the first time.
Beginning the installation of Tiny11 OS.
Proceeding along with the normal Windows installation. SElect the drive letter to install Windows 11 via the Tiny11 OS ISO.
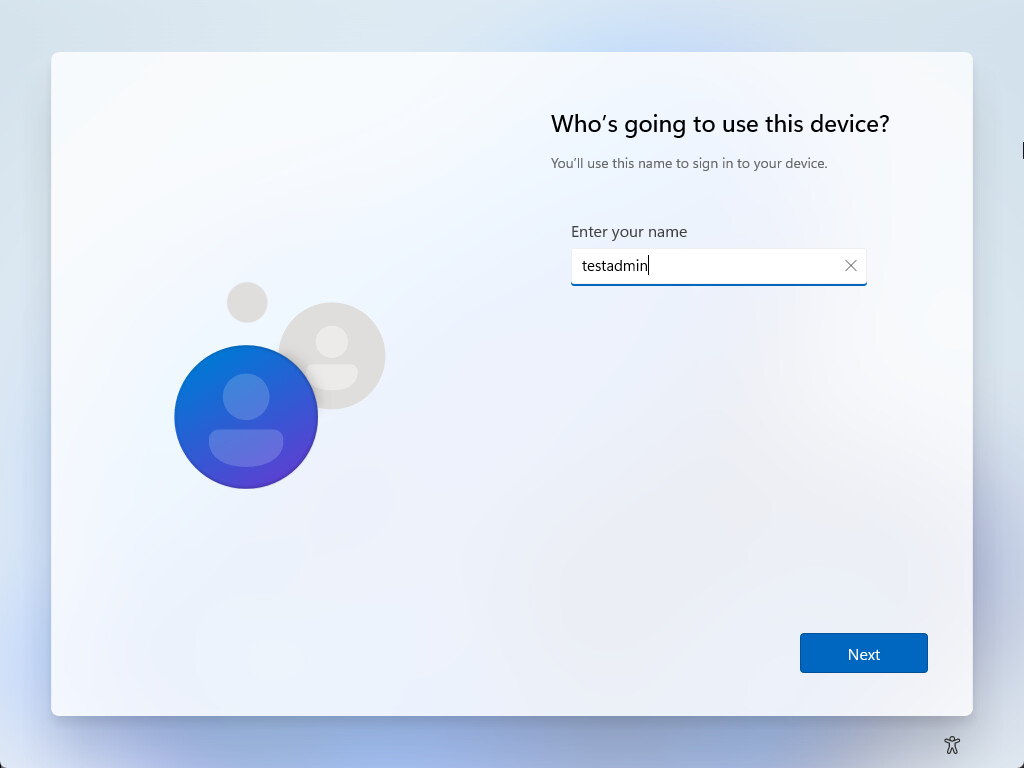
With the stripped-down version, I really like to see that you no longer have to create a Microsoft account, but you can simply create a local account.
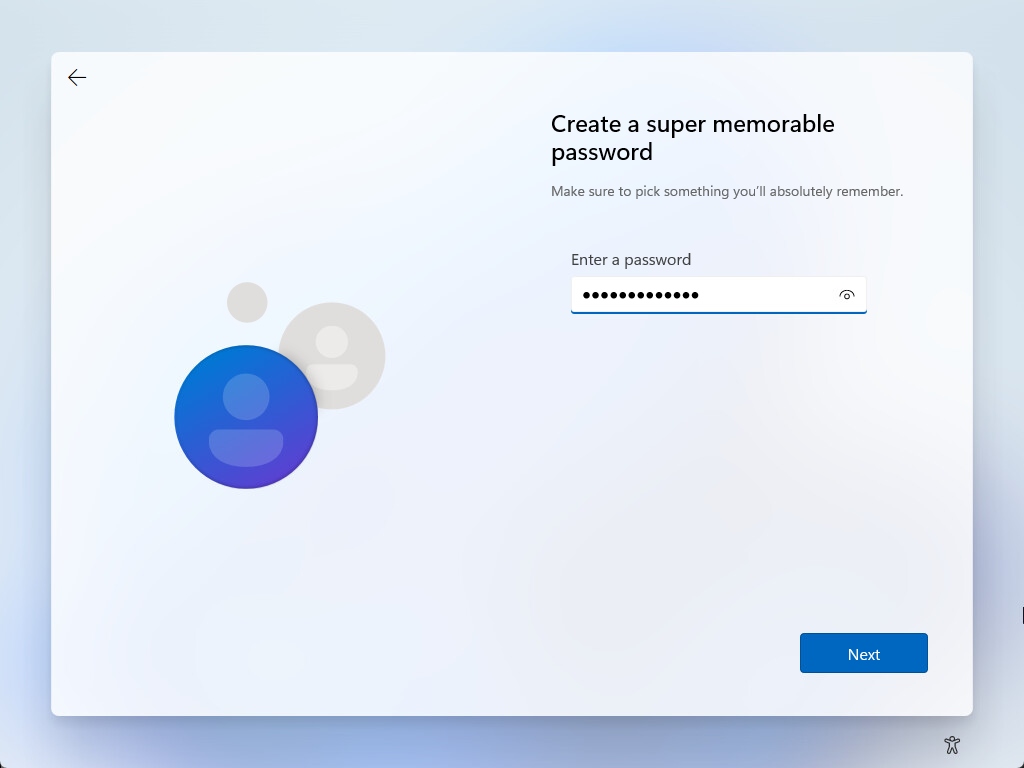
Configure a password for the local administrator account.
Customizing Tiny11 OS Settings for Better Performance
After installing Tiny11 OS, you can further optimize your system’s performance by tweaking some settings. Here are a few recommendations for optimizing your Tiny11 OS experience on older systems:
Adjust the visual effects: To reduce CPU usage and save system resources, you can adjust the visual effects in Tiny11 OS. Right-click on “This PC,” select “Properties,” click on “Advanced system settings,” and then click on the “Settings” button under the “Performance” section. Choose “Adjust for best performance” to disable most visual effects or select “Custom” and choose the effects you want to keep.
Disable unnecessary startup programs: Some apps start automatically when you boot your system, consuming valuable system resources. To disable unnecessary startup programs, right-click on the taskbar, select “Task Manager,” click on the “Startup” tab, and disable any apps you don’t need to run at startup.
Adjust power settings: To save system resources, you can adjust the power settings in Tiny11 OS. Go to “Settings” > “System” > “Power & sleep” and choose a power plan that best suits your needs. Consider using a “Power saver” or “Balanced” power plan for older systems.
Update your drivers: To ensure optimal performance, make sure your drivers are up-to-date. Visit your hardware manufacturer’s website to download and install the latest drivers for your system.
Support and Future Releases for Tiny11 OS
While Tiny11 OS is not officially supported by Microsoft, the community behind the project is actively working on updates and improvements. Future releases of Tiny11 OS may include additional features, performance enhancements, and security updates.
To stay informed about the latest Tiny11 OS updates and developments, follow the project on GitHub or join community forums and discussion boards. By participating in the community, you can share your experiences, ask questions, provide feedback, and contribute to the ongoing development of this lightweight Windows 11 version for older systems.
Remember that using a modified version of Windows, such as Tiny11 OS, may not be suitable for all users, especially in environments where data encryption and secure boot requirements are essential. Before using Tiny11 OS, consider your specific needs and whether a lightweight Windows 11 version is the best choice for your older system.Wrapping up
Tiny11 OS is an excellent solution for users with older systems that want to experience the benefits of Windows 11 without sacrificing performance. By stripping down the operating system and removing unnecessary apps and services, Tiny11 OS offers a lightweight and resource-friendly version of Windows 11 that can run on older hardware.
This blog post has covered various methods for debloating Windows 11, downloading the Tiny11 ISO file, creating a bootable USB drive, and installing the operating system on your older system. By following these steps, you can breathe new life into your old PC and enjoy the latest features of Windows 11 without investing in new hardware.
If you have any questions or need assistance with the Tiny11 OS installation process, please leave a comment in the section below. We hope this guide has helped get your older system up and run with Tiny11 OS, and we look forward to hearing about your experiences with this lightweight Windows 11 version. Don’t forget to share your thoughts and any tips for optimizing the performance of Tiny11 OS on older systems. Happy computing!


0 Comments